1. Read your camera manual.
I will probably harp on this in at least 50% of the posts I write about photography. That's because it's really, really important. If you know how your camera works, you have a much better chance of making it do what you want, when you want. You also won't waste valuable time (and possibly valuable light) trying to figure out if and where you can change a particular setting, or doing excessive trial and error in hopes of somehow getting the shot you want. Don't understand something in your manual? Google it. You never know when you'll need that piece of knowledge.
2. Work with your light.
Photography is all about light. If you don't work with your light, your photo will suffer for it--and this is as true for product photography as it is for art photography. Unless you're well-versed in the use of artificial lighting, your best bet is probably to stick with natural light. Although an overcast day might not give you beautiful blue skies in the background, it will provide you with soft, diffused light. This light is almost universally flattering. It might be a bit flat for an artistic shot, but it'll do very nicely for taking a pattern photo.
On the other hand, direct sunlight can be more difficult to work with (it certainly can be done, but it requires some experience, and often the use of fill flash and/or auxiliary equipment). If you must take photos on a sunny day, try positioning your subject in the shade, just at the edge, so the subject gets some softer light. If your subject is still suffering from hard shadows or a dark face, this is a time when you actually should use your flash. It'll help to fill in the shadows and get you a more even exposure.
 |
| In a matter of seconds, the diffused sunlight from the window I was working with turned into this harsh, direct light, destroying the image. |
Can't get outside? Position your subject next to a large window or another source of natural light. If possible, turn off other light sources such as overhead light. Can't do that either? At the very least, avoid on-camera flash, and play with your white balance to eliminate unflattering colour casts from the artificial light in your scene. Consider using a tripod, since lower light will probably lead to longer shutter speeds and will introduce the risk of camera shake, which results in blurred photos.
 |
| Soft light from a window in another room. |
3. Consider your background.
Before you snap your photo, look all around your frame--whether it's your viewfinder, or an LCD screen. Watch for things like trash, or the corner of a piece of furniture, or your cat's tail. Unintended objects in a frame can draw attention away from where you want it, towards where you don't. Keeping your backgrounds clean is one of the quickest ways to improve your photos. Don't be afraid to move things to tidy up your background (or your foreground, for that matter)!
 |
| Ugly light, ugly background--is there anything about this picture that is right? |
Think about how your background can contribute to or detract from your item. Are you trying to photograph a light blue mitten against white snow? Chances are, you'll lose some details. Try to find something with better contrast. Or are you trying to photograph a winter hat on what is clearly a bright summer day? Try to find a background that looks at least a little more appropriate for cold-weather gear. Avoid backgrounds that are visually busy; you want the focus on your subject, not your surroundings. Instead, choose backgrounds that make sense--backgrounds that somehow relate to the item, and show it off to its best advantage.
 |
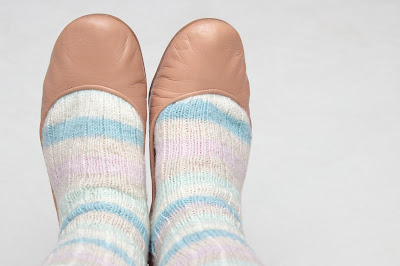
| Soft light and a clean background. A bit boring, maybe, but a much better representation of the socks. |
4. Place your elements intentionally.
Don't just centre your item in the frame and then snap the photo. Consider details, such as where limbs start and end (in a modeled shoot), or whether something might look better off to one side. Are you too far away from your subject, leaving it small in the frame? Move closer, or zoom in. Are you missing just one small portion of your subject, or feel like there's no breathing space around it? Move further away, or zoom out. If you're including props, consider where you want to place them. Don't obscure the best details of your design by placing the prop in between the details and the camera.
Consider also whether a horizontal or a vertical orientation is most appropriate. Often this will be obvious; if the item is wider than it is tall, it will generally work better in horizontal (landscape) orientation; if the item is taller than it is wide, it will generally work better in vertical (portrait) orientation. If you're not sure, take a few shots in both orientations and decide later, when you can see your images on your much larger computer screen. And even if the orientation seems obvious, consider shooting a few snaps in the other direction anyway--you might surprise yourself with what works.
Basically, everything in the frame should be in the frame, and in a specific location in the frame, because you intend for it to be there. Obviously this isn't always possible, but it should be the goal.
5. Use props wisely.
A photo can be greatly improved by the inclusion of some props, but these props should make sense. For example, placing a lace shawl on a table next to some fine jewellery makes sense; placing that same shawl next to a frying pan probably doesn't! You might want to style a pair of hands in mittens, and having those hands hold a snowball or a Christmas ornament would look great, but you probably want to avoid having them hold a popsicle!
 |
| Okay, it's a cute enough teddy, I guess, but why is it there? |
Those examples are obvious, but there are more nuanced pitfalls, too. For instance, if you're positioning a knit item with some knitting-related items, you might want to avoid placing scissors in the shot. Maybe it's just a personal thing (and I know we use scissors near finished items all the time, to trim ends and so on), but seeing scissors next to a beautiful knit object always makes me cringe just a little, and worry that something will accidentally be destroyed. Likewise, lit candles near knitting make me just a little nervous. This is more a matter of personal taste, but I think it is something to be at least conscious of when planning your images.
6. Tell a story.
You definitely want to focus on the design itself, but if you can include an element of story, your pictures will be more compelling--encouraging your viewers to focus on them for longer. Maybe you can relate your subject's surroundings to your pattern name. Maybe you can display a shawl on someone pictured preparing for a fancy night out. Maybe your blanket can be shown on someone lounging with a mug and a book. Emotional involvement makes for a more compelling photo!
 |
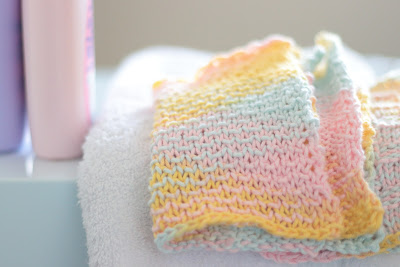
| Shampoo bottles and a towel make sense with a washcloth, and bring to mind a day at the spa. |
7. Learn basic post-processing.
You don't have to be a whiz, but the ability to do some basic adjustments to your photo can be immensely helpful in improving image quality. Make sure your horizons are straight, and anything that should be vertical is vertical. Is your white balance correct? Could your image benefit from a bit of sharpening (but don't go overboard, and don't bother trying to fix a blurred or out of focus image--it won't work)? Maybe you need to bump up the saturation a bit? Does your model have a pimple in the middle of her forehead that's attracting attention away from your beautiful hat?
 |
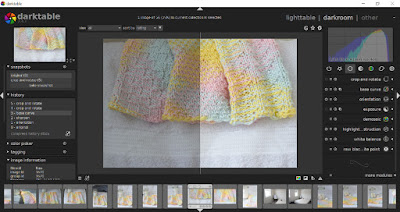
| Processing matters! |
You don't want your image to look obviously processed, but sometimes doing a bit of post-processing work can make your photo look closer to your original vision, or can simply make it more attractive or eye-catching. You may not love investing the time to learn new software, but it will almost always pay off.
What has made the most difference in improving your photos? Where do you still need to do some work? What tips do you have for your fellow fibre artists? Let me know in the comments!

No comments:
Post a Comment