Showing posts with label colour. Show all posts

Photo Editing Techniques: Levels

Today I'm going to talk about a simple but powerful way to change the appearance of your photos: the levels tool. This post may look long, but that's because there are a lot of images--don't be intimidated! This is fairly easy stuff that can make a huge difference in your images.

The levels tool can be found in most image editing programmes (including my favourites, darktable and GIMP) but for the purposes of demonstration, I'll stick to using darktable only. I will also be using a simple image containing various tones to demonstrate the effects of levels adjustments. I encourage you to download this image and play with it on your own; the easiest way to learn is through hands-on practice:

Right click and save as to download to your own computer.


 The basic anatomy of the levels tool is a box containing the histogram for your image, with a black-to-white gradient at the bottom and a set of three sliders. The levels tool in your software of choice may look slightly different, but it should function similarly. In darktable (and in many other editors), you will also see three eyedroppers; these allow you to move the position of the sliders more precisely (more on that soon).

If you're familiar with your luminosity histogram, the levels tool will probably be reasonably intuitive. The gradient at the bottom represents the distribution of tones in your image--it's sort of a guide to reading your histogram. On the left, you have your darkest tones, in the middle you have your midtones, and on the right, you have your lightest tones.

Adjusting levels in darktable. Click on the image to see full-sized Note that the histogram at the top of this screen capture and the histogram in the levels tool are the same, and represent the distribution of tones in sample image shown at the beginning of this post.

The sliders are used to tell your image processor which tones in the original image should be rendered as pure black, which tones should be rendered as pure white, and where your middle grey should be positioned. Their default positions, therefore, will be at the far left, the far right, and the middle of the histogram respectively.

If you slide your black point slider to the right, the amount of black in the image will increase--anything that was darker in the original image than the new position of your slider will be rendered as pure black. Note that the middle slider will automatically be repositioned in the exact centre between the new black point and the white point. Note also that the histogram for your image (at the top right of the screen) will also change to reflect the new tonal distribution:

Changing the black point (and with it, the mid-point).

 Likewise, if you move your white point slider to the left, all of the tones in the original image that are lighter than its new location will be rendered as pure white. Again, the midpoint slider will automatically reposition itself to the centre between the black and white points:

Moving the white point.

Moving the middle grey slider is a little trickier to explain, but basically, the slider determines which original tone will now be rendered as middle grey. Therefore, if you move the slider to the left, your overall image will lighten (although your black point and white point will not be altered unless you choose to move them), because you are telling your editor that a tone originally closer to black should be lightened to midgrey, and therefore the other tones will also lighten to reflect the new distribution of tones. If you move the midpoint slider to the right, the overall image will darken, as you are telling your editor that it should darken what was originally a lighter tone into middle grey. This is easiest to understand by playing around with the sliders yourself.

Lightening the image by shifting the midpoint.

If you want to precisely place the black point, white point, or midpoint, you can use the eyedroppers. Simply click on the eyedropper associated with the point you wish to change, then click on the area of the image that you wish to place at that point.

So how does this work in colour? Let's play around with two examples. First, a colour distribution:

I encourage you to also download this image for practice.


Let's try moving the black point...

Shifting the black point.

...and now the white point...

Shifting the white point.

...and now the midpoint...

Shifting the midpoint.

...and now all three points:

Shifting black point, midpoint, and white point.

See how the levels tool can dramatically alter the look of your image?

Finally, let's play with a real-world example:
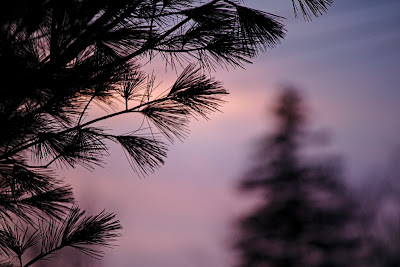
A Nova Scotian sunset.

See what happens if we shift the black point?

Moving the black point.

What about if we shift the white point?

Moving the white point.

And finally, what if we move the midpoint?

Moving the midpoint.

The levels tool is just that simple. And, to make life even better (at least in darktable), adjusting your levels will adjust your image in real time, letting you tweak it exactly to your liking. It's an easy tool that makes a powerful difference.

Two Camera Settings That Will Instantly Improve Your Fibre Photos (Probably)

I know, it's kind of a click-baity title, but it's also likely true. If you shoot in anything other than full manual and raw, you need to know about these two settings. And if my very cheap smart phone camera has them (it does--I checked), your camera probably does, too.

Ready?

1. White Balance

Our eyes and brains do a great job of adapting to whatever colour of light that we see in order to make an object look basically the same under a variety of light temperatures. Unfortunately, our cameras are not so smart. If you take a photo of a white swatch in daylight, it'll generally look about the same in the image as it does to your eyes. However, if you take the same photo under incandescent light, for example, your image will take on a distinct orange cast:

White yarn under tungsten (incandescent) lighting, auto WB.

 Thankfully, there is a solution: setting your white balance. Basically, the white balance setting lets you tell your camera what kind of light you're shooting under, so the camera can compensate for the colour of the light and give you a photo that doesn't have an ugly colour cast. Instead, your photo will look basically like the scene did to your eye. Auto white balance will often do a good job, but in some situations, you'll want to input it manually. Check your manual for how to set it correctly, because it's different on different cameras.

If you forgot to set your white balance and you have a photo with a significant colour cast, all is not lost. Many (most?) post-processing programs have a white balance editor. Often the easiest way to use this is with the eyedropper/click method. Find the eyedropper option under your white balance and then click an area of the photo that should be a neutral colour. I find that if I have a person in the photo, the white of one eye is often a good spot to select.

Same swatch. White yarn under tungsten lighting, custom WB applied.

What happens if you're shooting in mixed lighting--for example, with window light and incandescent light? Well, unfortunately, the colours don't just magically mix and average out to one colour (they might do this to a degree if they are coming from approximately the same location, but it will still be imperfect). So you can make a choice and choose your balance for one colour of light, but part of your image will likely have a (probably ugly) colour cast to it. Or you can eliminate one of the light sources and balance for the other--a much better option, but not always possible. Alternatively, you can shoot later, or somewhere else--or you can override the entire ambient light with an external flash unit, but I only recommend doing the latter if you're confident you can do it well.

If you're shooting in raw, I probably don't need to tell you this, but it doesn't matter what white balance you choose--you will set it anyway in post-processing. That said, setting it to approximately the temperature you want may give you a more pleasing in-camera image preview. I usually leave mine set to auto because it is adequate, and because I'm lazy, and then I correct it in post when necessary.


2. Exposure Compensation

Are your photos too dark or too bright? You've probably under- or overexposed. Although a bit counter-intuitive, photos with a lot of white or light-coloured areas will tend to be underexposed (too dark), and photos with a lot of black or dark-coloured areas will tend to be overexposed (too bright). This is often a problem in winter scenes containing a lot of snow, in close-up shots of particularly dark or light yarn, in images which include the sun or another a light source, or when there are a lot of deep shadows. It occurs because the camera sees in shades of grey, and when it is determining exposure, it wants to turn everything it sees into middle grey.

So if you take a picture of a white swatch using automatic exposure, it'll come out a dingy grey (underexposed) instead of a very light grey with white highlights (which the eye would 'read' as white):

No Exposure Compensation
(Aperture-Priority AE, 1.3s, f/7.1, ISO 100)
The actual swatch is white.

Conversely, if you let the camera automatically expose for a very dark blue swatch, it will instead render a more middle blue colour (overexposed), giving you an inaccurate representation of the item:

No Exposure Compensation
(Aperture-Priority AE, 15s, f/7.1, ISO 100)
The actual swatch is navy blue.
There is an easy fix for this. Check your camera manual and find out how to set your exposure compensation. If your photo is underexposed, move the exposure compensation toward the positive (+) side. If you are trying to portray a very light knit or crochet item accurately, you will probably need to use positive exposure compensation:

+2 1/3 Exposure Compensation
(Aperture-Priority AE, 6 sec, f/7.1, ISO 100)
Same white swatch; same location; same lighting.
If your photo is overexposed, move the exposure compensation toward the negative (-) side. If you are trying to portray a very dark knit or crochet item accurately, you will probably need to dial in negative exposure compensation:

-1 1/3 Exposure Compensation
(Aperture-Priority AE, 6 sec, f/7.1, ISO 100)
Same navy swatch; same location; same lighting.
So what happens if you want to shoot a scene with both very light and very dark areas? Well, you might not have a problem at all. If you examine the shooting information for the two accurate exposures above, you'll notice that they are identical--both the accurate white swatch and the accurate blue swatch, which were shot in identical locations under identical lighting, were exposed for 6 seconds, at f/7.1 and ISO 100. A test shot containing the two swatches confirms that the camera's dynamic range is fully capable of exposing correctly for both swatches and that in this case, its metering of a more balanced scene will be fairly accurate:

No Exposure Compensation
(Aperture-Priority AE, 5s, f/7.1, ISO 100)
Same swatches; same location; same lighting.

You may find yourself in a situation where you simply can't capture the full range of tones, however--in bright sunshine with deep shadows, when including a direct light source, with bright snow in the background--any number of scenarios. You have a few choices:
  1. Expose for whichever is more important: either for the brights/highlights, using positive exposure compensation, or for the darks/shadows, using negative exposure compensation
  2. Expose for the middle, (probably) using no exposure compensation, and possibly losing some detail in both your highlights and your shadows
  3. Use bracketing (and a tripod, if at all possible) and combine the images in post-production (beyond the scope of this entry; you can start with a google search for "HDR photography" if you're curious
  4. Use an in-camera HDR function, if your camera has one
What if you're shooting in full manual? You can manually compensate. If your photos are underexposed, instead of shooting with the light metre centred, shoot with it towards the positive side. If your photos are overexposed, shoot with negative exposure. Easy!

How do you know if you have exposed properly? Check the histogram when you review your images (I'm starting to sound like a broken record, but check your camera manual if you don't know how to do this). When in doubt, expose to the right--it's easier to darken the image without degrading quality than it is to lighten it. No idea what I'm talking about? Check out my post on histograms by clicking here.

White balance and exposure compensation: your new photographic best friends!